Moodle Installation with Windows Server
- Moodle Installation complete Process
Install Moodle lms on your server or
localhost to download Moodle package from
https://download.moodle.org/releases/latest/ and you will get moodle
package(code)with all software requirements and version details for running
Moodle on your server, It requires Apache, MySQL and PHP environment on your
server or localhost on your system.
There are 3 basic components to this
installation. Download and unzip the moodle package.
Start your web server for installation
on localhost for your other hosting server this will not require.Start to
install Moodle lms using the web browser.
- Start Moodle installation
Start your browser and type localhost or http://localhost within the address bar. you may either
begin your initial time Moodle lms installation or if it's already put in you may
enter the Moodle site's Front Page or Login screen.
- Select the Language of Moodle you install
Type the http://localhost/moodle
and hit the enter button you will displayed Moodle install page
Select the language (I select the
English for this example) and click on “Next” button.
- Moodle data directory Path
You have to give a path for the moodledata directory in Data directory section. If the directory does not currently
exist then installation process will create it on your PHP environment this
moodle data directory is created out of www folder. A directory has to read and
write permission on the server.
Click the “Next” button to continue.
- Select your Database
Moodle LMS support different types of a
database select the database which you will be used with Moodle.If you don’t
know the type of database then please go through your server technical support
to know the type of database.
Select and click on “Next” button to
continue.
- Configure your Database settings
This page displayed with some already
populated filled. You need to fill Database name, Database username and
database password, do not fill the Table prefix and Database port fields.
Click on “Next” button to continue
- Moodle copyright / license notices are displayed
Installation page will displayed as following,
click to continue
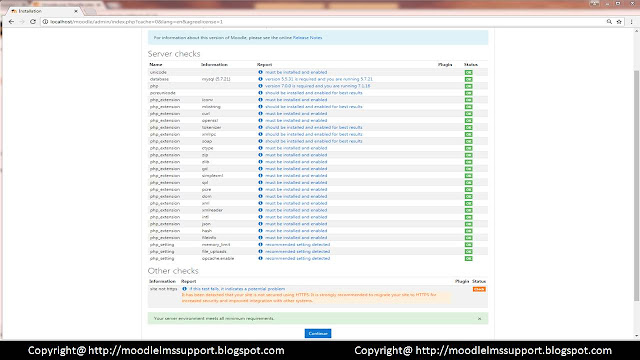
- Server Configuration Status
We can see our server meet the all
requirement specification or not, If not then we get the warning notification
in the footer of the page following server check page will be displayed
Click on continue for installation.
Moodle Installation now start we can
see the Moodle lms installs different modules
Moodle installation is finished click
on “Continue” to proceed.
- Administrator profile settings
Moodle lms site administrator user
provides you all access throughout the site, fill carefully the required fields
and remember the username and password of site administrator because all time
you have to log in using this detail.
Click on update profile button to
proceed.
- Moodle Front page settings
On front page setting page you have to
provide site Full name and short name of Moodle lms site also moodle lms ask you to set
your location and manage authentication setting where you enabled the user
self-registration setting, Click on save changes button.
- Outgoing E-mail Configuration
This setting asks you to edit the
email for which email ID used for outgoing email, The email ID you add here it
will use for “FROM” address those cases when recipients should not be able to
reply directly to the user. Click on save changes
- Admin Dashboard
Now you land on admin user dashboard
page where you can see the Course Overview box and left-hand side there is
navigation block where you can get to side administration setting or site Home
/ front page, right-hand side you can see the Calendar,Online users block also
you can update your admin setting click on right side Admin user


EmoticonEmoticon